

The creamy decoration on homemade keto desserts may seem like a purely decorative element, but in practice, it is a separate technological challenge. Flowers, petals, and neat borders are not achieved simply because someone has a good imagination, but because the cream withstands piping, holds its shape in coolness, and does not melt in hands within just two minutes. This is especially important in low-carb desserts, as the composition of creams here often differs from classic pastry schemes: less sugar, different behavior of sweeteners, different density of the creamy base, and a more noticeable role of stabilizers.
That is why beautiful creamy decoration starts not with coloring or a fancy piping tip, but with the right texture of the cream. If it is too warm, too soft, or made with random ingredient substitutions, no technique will save it. The flower will fall, the petals will become thick, the edges will blur, and everything will smear during transport. However, if the cream is made correctly and the person understands the working temperature, the decoration becomes quite repeatable even at home without restaurant equipment.
Why Texture is Important for Decoration, Not Just Flavor
Decorating cream and filling cream may be related in composition, but their requirements are different. The internal cream of the cake can be softer if it is placed between layers and supported by the overall assembly. The decorative cream for flowers and three-dimensional elements must hold the thin edge of the petal, maintain its shape after piping, and not lose it when briefly out of the refrigerator.
In keto desserts, sugar cannot be used as a regular structural crutch, so it is even more important to maintain the balance of cream, butter, egg yolk, gelatin, and stabilizing additives. If the recipe for decoration specifies a certain percentage of cream and a precise amount of butter, it is not a coincidence. These parameters help the cream to be both pliable and stable. A random substitution with thinner cream, too soft butter, or another stabilizer quickly breaks the entire result.
What Tools Are Really Needed for Cream Flowers
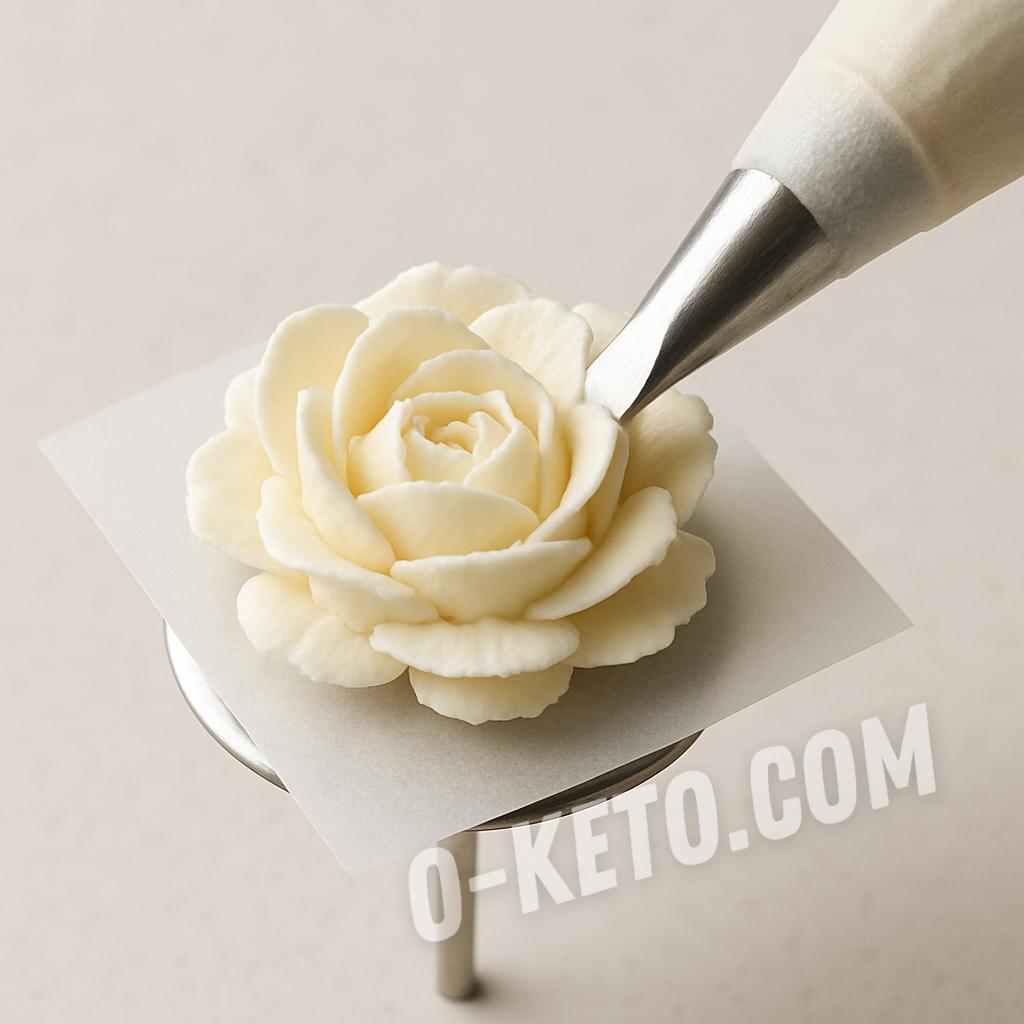
For home cream decoration, you don’t need a huge pastry setup, but it’s better to gather a basic kit in advance. The most useful items are a pastry bag, square pieces of parchment for piping flowers, one or two reliable bags, a petal nozzle, a spatula for mixing cream, and a flat board or tray to conveniently transfer the preparations to the refrigerator. If leaves are planned, a separate nozzle for greenery will also be useful, but you can manage without it at the start.
A very convenient working scheme is to use an outer bag with a nozzle and insert smaller inner bags with cream of different colors into it. This way, when changing shades, you don’t have to completely reassemble the working bag each time. Only the inner cream bag changes, while the nozzle and outer bag remain in place. This simplifies the work, especially if there are several shades and the cream needs to be periodically stored in the cold.
There are also small technical details that significantly affect the quality of the petals. For example, some petal nozzles have their edges slightly pinched to ensure that the base of the petal is not too thick. This is not a necessary trick for everyone, but it well illustrates the main idea: a beautiful flower is made up of small technological nuances, not just inspiration.
Working Temperature and Why Hands Ruin Everything Faster Than It Seems
For cream decoration, the working temperature plays an almost key role. If the cream has stabilized in the refrigerator, it doesn’t mean that it is already comfortable to pipe flowers with it. Often, after full stabilization, it is slightly whipped to regain softness and then kept within a range where it remains pliable but does not run. For many such creams, the working zone is around 10–15 °C.
The problem is that warm hands quickly shift this temperature. Even a good cream can soften right in the bag if held in the palm for too long while working slowly. Therefore, it is more convenient not to overfill the bag and not to load it with the entire mass at once. It is better to take as much as can realistically fit in the hand and be controlled without constant overheating.
If the cream starts to become too soft, the right solution is to cool the inner bag with the cream, not the entire bag along with the nozzle. When the nozzle with leftover cream goes into strong cold, the product inside it can harden too much and then interfere with even piping. This increases the pressure on the bag, which can work in jerks and even tear. It is much more convenient to keep the working equipment stable and cool the replaceable part with the cream.
How to Color Cream Without a Gritty Texture and Unwanted Flavor
For home decor, gel food colorings are the most convenient. They provide richness without noticeably thinning the cream and allow for experimentation with both deep and pastel shades. A good practice is not to color the entire batch of cream in one color at once, but to work with small portions. This makes it easier to achieve smooth transitions, marbling, and a vibrant palette, rather than just one flat shade across the entire cake.
When using dry natural colorings or powdered options, you usually need more, which can affect both the taste and the behavior of the cream. Therefore, for the first careful decoration, it is more practical to work with small doses of gel colorings. It is better to add color gradually, mixing with a spatula and observing how the tone changes after fully incorporating it into the mixture.
Why It’s Useful to Train on Thick Icing First
One of the most sensible home strategies is to first practice the movement on a thick training icing rather than immediately on the finished cream. This allows you to calmly understand the logic of the nozzle, the direction of movement, and the pressure on the bag without the risk of melting the actual decoration in your hands. The principle is very simple: first, a person learns to handle the petal, and only then transfers this technique to the expensive and more temperamental cream.
This approach saves not only ingredients but also nerves. When there is no fear of ruining a real batch, the hand learns faster how to create the base, how to guide the narrow edge of the petal, where to reduce pressure, and how to lay down the next row. After this, the transition to the real cream goes much more smoothly.
How to Transfer and Store Finished Flowers
Finished flowers can be conveniently placed on small squares of parchment paper, then transferred along with them onto a board or tray and stored in the refrigerator. This method helps avoid touching the flower itself unnecessarily. While the decoration cools, the structure becomes more stable and can better withstand further assembly of the cake.
If the cream allows for freezing, flowers can be placed on the cake even while partially frozen. This often makes the final assembly easier: the petals deform less, and the composition holds its intended shape better. Once on the cake, as it sits at room temperature, the decoration becomes softer and more delicate. Therefore, it is especially important not to place such elements too early if there is a lot of time before serving and the room is warm.
Common Mistakes in Home Cream Decorating
Almost all problems with cream colors boil down to a few recurring mistakes:
- using cream that is too soft for piping;
- accidentally changing the fat content of the cream or the ratio of butter;
- overheating the cream in the bag with warm hands;
- trying to work with an overfilled bag;
- taking too much coloring at once and getting a loose or “dirty” mixture;
- transferring flowers without a parchment base and crushing the base;
- placing decorations on the cake before it has cooled and stabilized properly.
If you break down these points, the work becomes much calmer. Home cream decorating is quite achievable when a person approaches it as a technique rather than a random improvisation.
Conclusion
Cream decoration for keto desserts relies on three things: the right cream composition, cold discipline, and convenient working mechanics. For stable colors, precise fat content and stabilizers are important, the working temperature is approximately 10–15 °C, small portions of cream in the bag, and transferring colors onto parchment followed by cooling. When these conditions are met, homemade roses, peonies, leaves, and small decorations become quite repeatable and do not require a professional studio.