

A good broth does not need to be a restaurant project, but it does depend on a few simple rules that shape both flavor and clarity. If the goal is a reliable base for soups, sauces, braises, and quick home meals, the most important things are choosing sensible bones and cuts, keeping the heat very gentle, skimming early foam, using vegetables as background rather than the main event, and cooling the finished broth properly. Cloudiness is rarely mysterious. It usually comes from hard boiling, over-stirring, overheating, or careless straining.
For a low-carb kitchen, broth is especially useful because it makes meals faster and less dry. It gives depth to soups without starch, helps reheat protein and vegetables more gently, supports sauces, and makes it easier to build a warm meal without starting from zero. It is still best seen as a practical culinary foundation rather than a magical cure-all. The value is in how it improves everyday cooking.
Which bones and parts work best
Flavor depends on more than animal type. It comes from the balance of bones, meat, connective tissue, and fat. For a home broth with body and clean taste, it helps to use bones that still carry some meat, joints, poultry frames, necks, wings, ribs, tails, and other parts that release flavor slowly. Bare empty bones give less character, while only rich fatty meat can make the liquid heavy without giving the same layered depth.
For chicken broth, frames, backs, wings, necks, and cartilaginous pieces usually work very well. For a stronger meat broth, beef or veal bones, joints, ribs, and tails are common choices. If you want more roasted depth, some bones can be browned first in the oven, but that is optional. A lighter broth can stay unroasted and more neutral. The key is not to burn bones or vegetables, because bitterness is much harder to fix than mildness.
Why a gentle simmer matters more than power
One of the most common mistakes is treating broth like something that must boil hard to become strong. In reality, aggressive boiling breaks proteins, fat, and fine particles into suspension, which turns the broth cloudy and makes the taste rougher. A better target is a very quiet simmer: small occasional bubbles, calm movement, and no rolling turbulence inside the pot.
This is not only about appearance. A gentle simmer extracts flavor more smoothly, prevents fat from emulsifying too aggressively into the liquid, and makes surface foam easier to remove. That matters even more if the broth will later become a clear soup or a refined sauce base. Stronger boiling can still produce edible broth, but it is usually less clean in both texture and flavor.
When to add vegetables and how much
Vegetables in broth are supporting players, not the main volume of the pot. Onion, carrot, celery, garlic, bay leaf, peppercorns, and herbs help round out the flavor, but too many vegetables or too much time can push the broth toward sweetness and blur the meat base. A moderate amount usually gives a cleaner result than a crowded pot.
It often makes sense to add vegetables later rather than at the very start of a long simmer. By that point the bones and meat have already released much of their deep flavor, and the vegetable aroma stays fresher instead of turning dull and overcooked. If the broth is meant to be a neutral base for several different meals, keeping the vegetable note restrained makes later cooking more flexible.
How to skim and avoid cloudiness
Foam is not a disaster. It is simply coagulated protein and surface impurities that rise during the early heating stage. Skimming it with a spoon or skimmer as it appears is usually enough. There is no benefit in stirring it back into the broth. In fact, the calmer the pot, the easier it is to lift unwanted material from the top and keep the liquid cleaner.
Once foam rises, let the surface settle for a moment and remove it gently. After that, disturb the broth as little as possible. Many cloudy broths are created less by the foam itself than by constant stirring and attempts to speed the process up.
How to strain and cool finished broth
When the broth is done, strain it without shaking the pot. A practical home method is to let the large particles settle briefly, then pour the liquid carefully through a fine sieve or a colander lined with cloth into a clean pot or bowl. Cloudiness often increases right at this moment if everything is dumped out roughly.
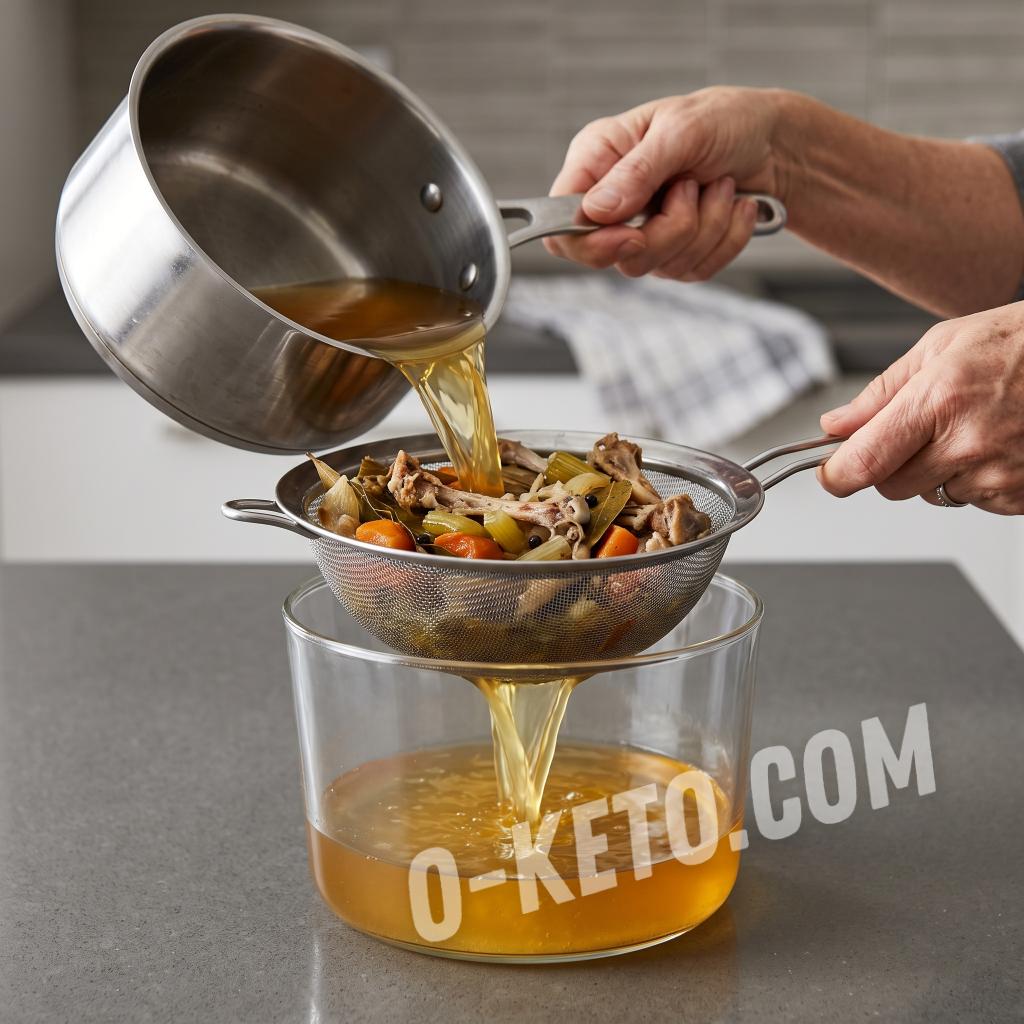
After straining, do not leave the broth warm for hours without purpose. If it is not being served right away, cool it promptly and then refrigerate it. It can also be portioned and frozen for later. The fat layer on top can be kept during storage or removed later if a lighter finish is needed.
How to store broth at home
For real life, portioned storage works best: some broth for the next few days in the refrigerator and the rest in the freezer. Small containers and flat freezer bags help avoid thawing more than you need. If the broth is meant to support multiple dishes, keeping it fairly neutral makes it easier to turn it into soup one day and sauce or braising liquid the next.
Cool broth fully before freezing. If it contains a good amount of fat, that is not automatically a problem, but it helps to know how you plan to use it. Fat can be useful in soups and braises, while a lighter serving can be made by chilling the broth and removing part of the solidified layer later. Labels with the date and the type of broth are also worth the effort.
What not to do
Most broth problems come from ordinary habits: too much heat, constant stirring, too many vegetables, salting too early, trying to reduce everything aggressively, and straining carelessly. It does not have to become a laboratory exercise. A steady gentle process gives a better result than a heroic one.
And if the broth ends up a little cloudy, that does not make it bad. It can still work beautifully in pureed soups, sauces, braises, and everyday cooking. Clearer broth simply matters more when you want a delicate texture and a cleaner presentation.